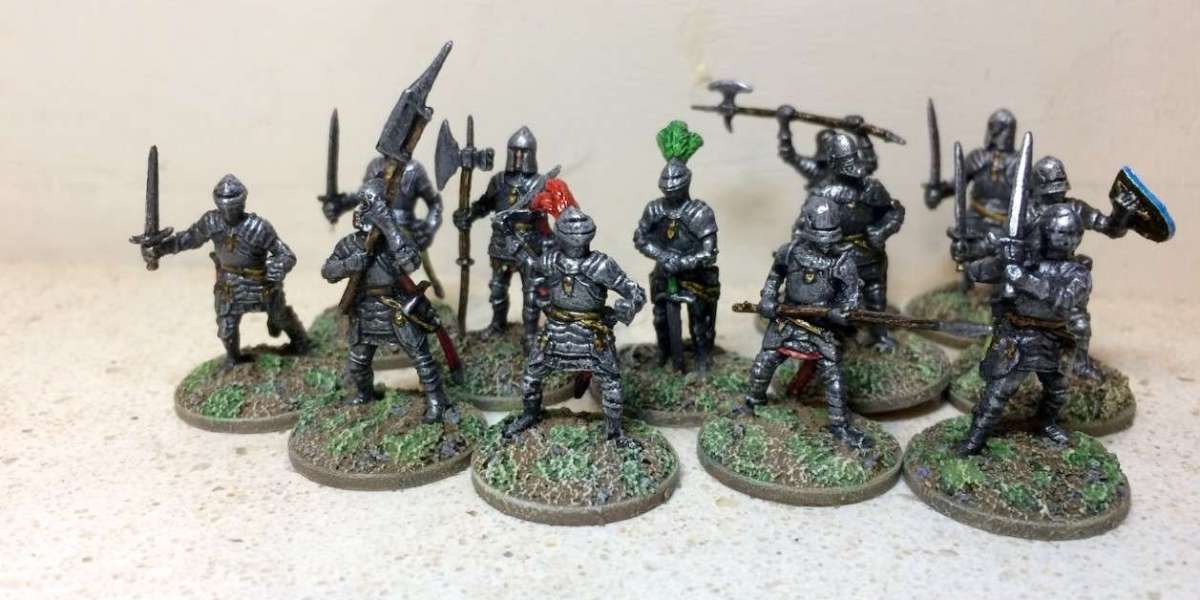
Introduction
Building and painting figure model kits can be one of the most rewarding hobbies for those with an eye for detail. Whether you're creating a historical diorama or a fantasy scene, mastering the art of assembly and painting will elevate your projects to a whole new level. In this guide, we’ll share pro tips for painting and assembling figure model kits, making the process easier and more enjoyable. From the right tools to advanced painting techniques, you’ll learn everything you need to know to take your hobby to a professional standard.
Essential Tools for Painting and Assembling Your Figure Model Kit
1. Hobby Knife and Sprue Cutters
Before you even think about painting, you’ll need the right tools for assembly. A precision hobby knife is perfect for trimming sprues and cleaning up excess plastic. Sprue cutters, on the other hand, will help you remove parts with minimal risk of damaging them.
2. Fine Brushes for Detail Work
Invest in high-quality, fine-tipped brushes for painting intricate details like eyes, facial features, and small accessories. A good set of brushes will ensure you can achieve sharp lines and fine details on your model.
3. Sandpaper and Files
Smooth out rough areas and remove seams from molded parts with fine-grit sandpaper or small files. This will create a more professional finish before you start painting.
4. Paints and Thinners
Acrylic paints are most commonly used for figure models because they dry quickly and are easy to work with. Be sure to have a range of colors for different clothing, weapons, and skin tones. Thinners can also help dilute the paint to the right consistency for airbrushing or washes.
Assembly Tips for a Clean, Professional Finish
1. Clean Your Parts Before Assembly
Before gluing or painting, clean your parts thoroughly. Use warm water and mild soap to remove any oils or mold release agents that could interfere with the adhesive or paint. This ensures better adhesion and paint adherence.
2. Dry Fit Before Gluing
Always dry-fit your parts together before applying glue. This helps ensure everything aligns correctly and allows you to make adjustments before committing to the glue.
3. Use the Right Adhesive
When assembling plastic figures, plastic cement works best as it melts the plastic slightly to create a strong bond. For smaller, delicate parts, super glue might be a better option to avoid excess mess.
4. Assemble in Stages
Instead of assembling your model all at once, break it down into smaller sections. This way, you can focus on smaller areas and ensure better attention to detail.
Painting Techniques to Elevate Your Models
1. Prime Your Model
Priming your model before painting ensures that the paint adheres properly and that you get even coverage. Use a light coat of primer, which will also help highlight any imperfections that need sanding or smoothing before painting.
2. Use Thin Layers of Paint
Thin layers of paint allow you to build up the color gradually, providing a more even and controlled finish. It’s better to apply multiple light coats than to try to cover everything in one thick layer.
3. Dry Brushing for Highlighting
Dry brushing is a technique used to highlight raised areas of your model. Simply dip a brush in paint, wipe most of it off, and lightly drag the brush over the raised areas. This brings out the texture and details of your figure.
4. Use Washes for Depth
Washes are liquid paints that you apply to the recesses of your model to add shadows and depth. They settle in crevices and make the details pop, giving your model a more realistic and three-dimensional appearance.
Advanced Painting Techniques for a Realistic Look
1. Airbrushing for Smooth, Even Coats
Airbrushing is an advanced technique that can give your models a professional look. It’s ideal for applying smooth, even coats of paint or creating gradient effects. If you’re new to airbrushing, practice on scrap pieces before using it on your main model.
2. Creating Realistic Skin Tones
For figure models, realistic skin tones are a must. Mix several shades of paint to match the tone you’re aiming for. Start with a base color, and layer lighter and darker shades to create depth and realism. Use washes to bring out the shadows in skin folds.
3. Weathering Effects
To make your model look battle-worn or aged, use weathering techniques like rust effects, mud splatters, or chipped paint. Weathering powders, rust washes, and even streaking effects can all help your figure look like it’s been through some real action.
4. Painting Eyes and Faces
Painting eyes and facial features can be one of the trickiest parts of figure modeling. To make eyes look realistic, use a fine brush and light colors for the whites and pupils. Pay close attention to the symmetry and size of the eyes, as they can make or break the model’s expression.
Finishing Touches: Sealing and Displaying Your Model
1. Seal the Paint
Once your painting is complete, seal your model with a clear varnish. A satin or matte finish will give it a natural look, while a gloss finish is ideal for shiny surfaces like armor or vehicles. The varnish will protect your paintwork and help it last longer.
2. Add Accessories and Decals
Adding small accessories, like weapons or gear, can give your figure extra realism. Decals can also be used for insignia, labels, or other details. Be sure to apply them carefully using decal-setting solutions to ensure they mold correctly to the surface.
3. Display Your Work
Once your figure is finished, display it proudly! Consider using a display base or case to protect it from dust and damage. You can also add extra effects like a diorama or background to tell a story.
Conclusion
Painting and assembling figure model kits like a pro is all about patience, attention to detail, and mastering the right techniques. From proper assembly to advanced painting methods, every step is an opportunity to refine your skills and bring your vision to life. With the right tools, techniques, and a bit of practice, you’ll be creating stunning models that look like they belong in a museum. So, grab your tools, get your hands dirty, and start building your next masterpiece!
FAQs
- What type of paint is best for figure models?
Acrylic paints are generally the best choice for figure models because they dry quickly and provide smooth, vibrant finishes. - How do I make my figures look realistic?
Use techniques like dry brushing, washes, and weathering to add depth and texture, making your figures look lifelike. - Can I use an airbrush on figure models?
Yes, airbrushes are great for applying smooth coats and creating gradients, but practice beforehand to master control. - How do I paint small details like eyes?
Use a fine-tipped brush and carefully apply lighter colors for the whites and darker shades for the pupils. Take your time for accuracy. - How do I protect my painted figures?
After painting, seal your figures with a clear varnish to protect the paint and prevent it from chipping or fading over time.